Shop thousands of products which on you can change colors, sizes, etc. ... for yourself or as gifts for others.
Displaying: 1 - 15 of 15
February 21st, 2023

Blog 15: FAA Product Order Process
ORDER PROCESS FOR IMAGES ON FAA WEBSITES
The order process is really simple if you just compete each step ... and do not get in a hurry.
ORDER PROCESS FROM START TO FINISH:
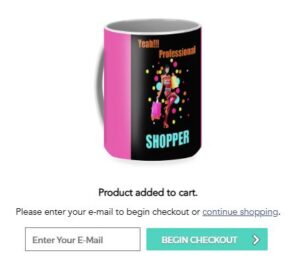
Enter > Your E-Mail ... Click > BEGIN CHECKOUT > button
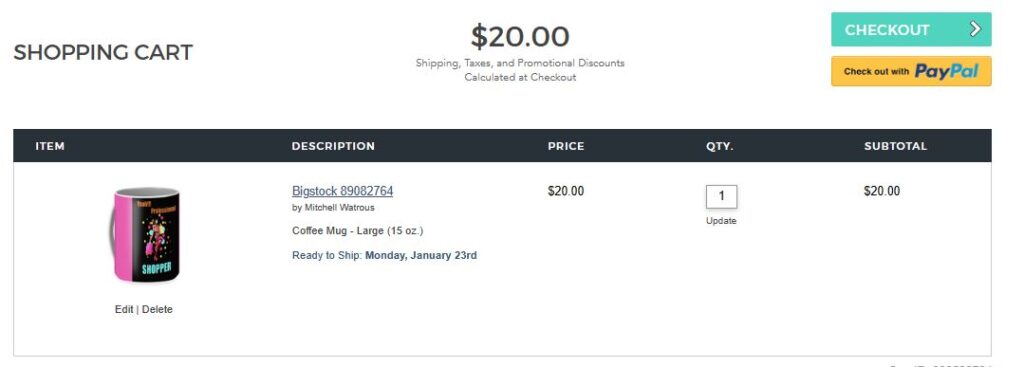
Click > CHECKOUT (as shown in image below) ... or use PayPal
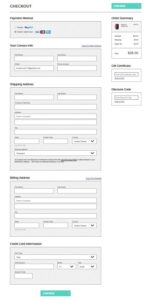
Enter > Payment Method ... Shipping Address ... Billing Address ... Credit Card Information as shown on the form below ... and then .... CLICK> CONTINUE
Carefully ... Correctly ... Fill in all pertinent order information on the form below.
If you make a mistake ... you will get this message ... with corrections indicated:
OOPS ...SOMETHING IS NOT RIGHT
You may get a SHOPPING CART form like this again ... after making any corrections.
Make Any Correction > ... Then ... Click > CHECKOUT

OK ... YOU ARE NOT DONE YET ...
JUST ONE MORE FORM TO COMPLETE ... THE REVIEW & SUBMIT form like the one below:

Your Shipping Address ... and Payment Information will appear for you to review.
Notice: There is an Edit link beside your Shipping Address and Payment Information.
CORRECT any errors before you hit that SUBMIT ORDER button.
Click > SUBMIT ORDER
If you have any questions about your order ... you can call any time 24 hours per day. The current phone number from USA is 877-807-5901 (but check to make sure what the phone number will be from your current location).
Note: The 30-day return guarantee is within 30 days of the order date ... not the receipt of the product date.
How can you get the book? Once again ... here is the information:
| https://www.amazon.com/dp/B0BTFRP4P3 | [$4.97] eBook |
| https://www.amazon.com/dp/0981862845 | [$11.97] Print Book |
The print book is also very good ... and many people prefer to have a print book in addition to an eBook.
February 21st, 2023

Blog 14: Art Options To Consider
There Are Many More Print Art Options To Consider
This blog will be a refresher to reinforce some information in previous blogs that may have been missed.
To begin: You can open and play around on this website: https://mitchell-watrous.pixels.com (and keep it open in a handy place such as on one of your tabs, or down in your bottom tray). (Note: This is my website which I use mainly for tutorials and training ... but you can buy anything on it if you want to.)
Click > Collections (currently 30+). Explore a little bit … there are over 1300 images in different Collections. Be aware that not all FAA artists list any of their images in a "Collections" category ... but have them spread throughout their websites.
In this blog I want to show you how to go find, buy, and/or use other artists' websites and their art.
NOTE: It does not matter which image you open in ANY FAA ARTIST’S website (i.e., over 1 million FAA Artists!). You can use any image on ANY product on just about ANY FAA website.
Here are a few things you should know and do:
Go to: Click > https://fineartamerica.com/ ... and find something you like (i.e., notice that there is a Collections category on the main FAA website ... which you might want to explore later).
Nevertheless, we will use the Search function to find just about anything possible that we might want.
Near the top, Click > Search (in the box) ... and it will split into two options in the Search Box:
If you are only doing a keyword look up ... just ignore the Keyword V section ... and place your mouse cursor on top of the word Search and type a keyword directly over top of it.
But ... if you already have some specific information you want to search ... do the following ...
Click > Keyword V ... and we will have a menu with four "Search" options drop down for us:
If we already have a title and an artist, (i.e., if we already have: Ruby Garden Jewel Photograph by Christina Rollo) ... we can simply follow this process:
Click > Keyword V ... then, Click > Title + Artist ... then type in Ruby Garden Jewel + Christina Rollo * (i.e., where the word Search appears) ... and Click > Enter ... or Click the ![]() (* Note: You must type the + sign. Do NOT type the word by to replace the + sign. If you do ... you will probably get NO MATCHES.)
(* Note: You must type the + sign. Do NOT type the word by to replace the + sign. If you do ... you will probably get NO MATCHES.)
A successful Search should pull up a page with several images. Look around until you see one called: Ruby Garden Jewel Photograph (note: you might find it down in a section called " VIEW ALL RUBY GARDEN JEWEL CHRISTIN ... )
OR ... you might not find the image at all ... and get a message of: NO MATCHES (i.e., this could happen with any image search).
In that case ... don't give up. Just "Refresh" and go back to the Search box and do a simple Keyword search:
So … let’s go! If you still have your image ... or if things did not quite go right for you ... Click > the link below that will get you there:
https://fineartamerica.com/featured/ruby-garden-jewel-christina-rollo.html
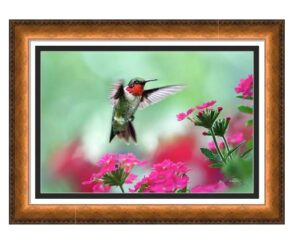
Click > Framed Print in the menu (while on the "working" website), and you should open a new page that looks like this one that you can use for making changes: *
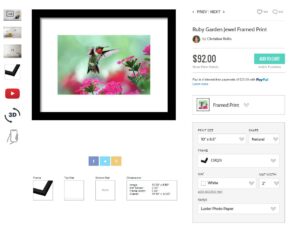
* Notice to the left of the Framed Pint that there are seven small icons in a vertical row. You can click on those to see what the Framed Print could look like on your wall.
Remember that the image shown above here is just a demo. You will have to go back to the
"working" menu page to make change (i.e., while reading this blog).
Next ... Click > Print Size ...then, Click > SHAPE
5 Sizes for Natural SHAPE print options
2 Sizes for Vertical SHAPE print options ... look for a teaching moment. Notice of cropped photo
2 Sizes for Horizontal SHAPE print options ... look for a teaching moment. Notice of a cropped photo ... and this one is cropped (I would not choose this one).
2 Sizes for Square SHAPE print options ... look for a teaching moment. Notice of a cropped photo ... this one is also cropped (I would not choose this one either).
A Notice of cropped photo usually indicates that the photo you receive will NOT have all of the image data that you should receive in the Natural Print options ... and this could happen with ANY artist’s images that you might choose to order ... so, be careful! Here is the warning message you might see when a photo may be cropped (i.e., cut):
You've selected a cropped version of the artist's design. Please make sure that you're OK with the cropping before placing your order.
Click > FRAME to choose from about 12 different FRAME COLORS ( i.e., Beige through Yellow). This is very useful for matching a frame color with the colors in an image or a wall color.
Click > None if you do not want a frame around your art-work image. In this case, your image will appear as a single, flat image without borders or frames ... but be sure to click Natural SHAPE to ensure that you will not receive a cropped image.
VERY IMPORTANT POINTS
Note: Most of these Wall Art images come with pre-attached hanging wire, mounting hooks, and nails (when applicable) … and usually ships within 2-3 business days. There is a 30-day money-back guarantee (whether for yourself or sent as a gift).
Top and Bottom Mats
Click > NONE if you do not want any Top Mat or Bottom Mat borders around your framed image. Note: You will have 8 Top Mat color choices (i.e., the color next to the Frame) ... and the number of color choices may vary over time.
When you choose a Top Mat you will have the option to include a Bottom Mat (the color next to the image) ... and there are about 8 color choices for the Bottom Mat ... and the number of color choices may vary over time.
You can do some amazing things in this menu. Many people do not know this, but you can “dress up” your images with hundreds of option variations in sizes and colors with your Top Mat and Bottom Mat color options.
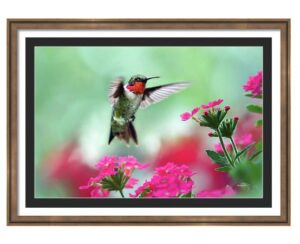
Here are just four examples ... with the same art example ... observe the differences used for each example:
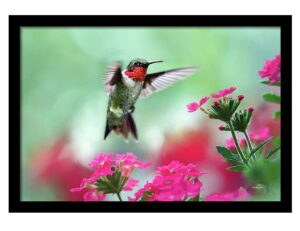
* This is an example of a Framed Print without any Top or Bottom Mat borders between the frame and image. Some buyers (but not all) prefer some photos without Mats.
Note: You should also try all Black Frame options to see which one brings out the best qualities of the art and its surroundings. Notice that there are several vertical icons (in the working image website) ... which you can click ... to can give you some ideas of what the art will look like on the wall).
Note: How the size, color, and presence of Top and Bottom Mats affect your art image. Remember, you can change anything as many times as you like before you commit to purchase.
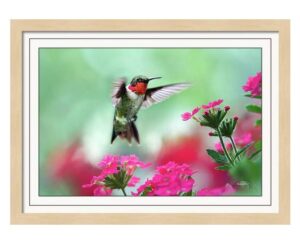
*If you choose the MAT color White with Black Core ... it will add a border-line boundary around the color. In this case, it was chosen for both the TOP and BOTTOM MATS to show what you can do with it ... and we see that there are two border lines. Play around with this option to see what you like when using it. (For example, a different Frame choice might really enhance this Framed Print.)
* Here are some Big Tips for you ... to save a lot of time and work:
Color Choices
Before all is said and done ... and no matter how much I research ... I cannot find any other source that has as many talented, professional artists, and resources as Fine Art America.
Go back to Blog 1: Advantages For You in this blog series and review Table 1 to totally prepare yourself for the most helpful adventure you can take in discovering the greatest art in the world ... and what you can do for yourself and your gifts.
The color choices for the Top Mat and Bottom Mat borders are limited to 8 of the same colors for each. Be aware that color options can change over time.
Enjoying art for the sake of art is one approach life. However, many people are interested in the appearance of an art piece ... and how it looks wherever it is placed.
For example, what are you trying to color-coordinate? You can find a million ideas on the internet for ways to decorate you living space with various colors, objects, and art. Here are just a few:
https://www.thespruce.com/choosing-artwork-by-room-4155124
https://www.housepaintingtutorials.com/wall-color.html
You can find millions of helpful resources on the internet ... but sometimes, if you can afford it ... it may be best to ask for help from an interior decorator if you have a large or expensive project.
But one thing is for sure ... and keep this in mind ... there is no larger company with most of the world's top artists producing their art products than on Fine Art America websites. I have not been able to find better art ... or artists ... anywhere in the world!
And, if you are just looking for some helpful information about color and combinations, here is an excellent link to get ideas for colors: https://www.colorhexa.com/color-names
Important Note: Sometimes a computer might “hang up” and become unresponsive ... and refuse to make the changes you want fast enough. That is very irritating ... and I know it does happen ... because it has happened to me.
Why does that happen? Could be many reasons ... but sometimes it could just be an issue with “computer capacity, processing speed, excessive cache, or memory” or some other issue.
When that happens ... just click-out of the process ... and start all over. Go back to the link you started with ... and start experimenting again.
In some cases, you might even have to refresh or reboot your computer when it seems to get “locked-up” ... and defies any attempt to cooperate with you.
As you can see … you can have fun and play all day with hundreds of options at your fingertips ... and as you will see later it could be profitable for those in business.
For example, you can change the picture sizes, types of frames, and types of Top and Bottom Mats. Note: You can also change the sizes of the Top and Bottom Mats for additional visual effects.
If you do not wish to have a Bottom Mat at all ... just leave it out ... and your Top Mat becomes a border that will fill in the color space between your image and the inside of the frame. You don’t have to be in a hurry to create perfection … just take your time and totally enjoy the process.
Can you imagine … you could send two friends the same picture image with totally different color schemes and effects just by varying the choices of all your options for each image.
By the way … I have shown you only a few of the hundreds of thousands of variations you can make yourself with just that one image … and you can do this with any of the images you find on other artists’ FAA websites (more about that in a future Blog).
PAPER: There are two basic ways to order the type of paper you want to use for your images ... but that will NOT change the type of paper you can choose:
There are 8 options for the “type of paper” used to imprint an image. Unless you are a professional photographer, you might want to seek some professional guidance before trying to order and mount your own images ... or just select the "preferred or recommended" paper option.
However, to select the “Paper” quality for your images, follow these steps:
You will find 8 PAPER options. Be sure to Click > on the ⊕ Symbol beside each paper-type and finish ... to get further information about each paper type (i.e., remember to do this on your active link):
Note what the (recommended) paper type is … but if you want to refine your paper choice, you should review the “paper-type” details in the ⊕ symbol beside each paper type.
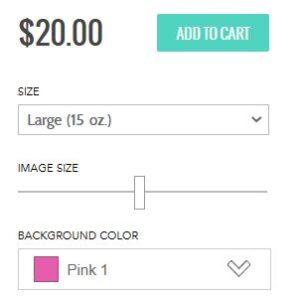
Note: On many products you will be able to place, or position, the image and re-size it ... but this option is NOT available on Wall Art (as noted by the absence of any "Slider" options to resize or reposition an image).
In case you have not had the opportunity to do so yet, here is the order information for the important tutorial book that can help you through many rough spots on FAA websites:
How can you get the book? Once again ... here is the information:
| https://www.amazon.com/dp/B0BTFRP4P3 | [$4.97] eBook |
| https://www.amazon.com/dp/0981862845 | [$11.97] Print Book |
The print book is also very good ... and many people prefer to have a print book in addition to an eBook.
February 21st, 2023

Blog 13: Quality Art Differences
What Are Quality Differences Between Art Prints and Posters?
Actually ... there seem to be NO major differences between Art Prints and Posters as offered on the Fine Art America (FAA) website. And, sometimes ... no matter how you do it ... the results seem as good one was as another. Experiment ... to find out!
All FAA artists’ customers have access to the same options for their products. In general, the main differences depend upon customers’ abilities to choose their colors and other options.
But as far as Art Prints and Posters are concerned ... compare the “Finish” Description for each product (Art Prints and Posters).
You will find access to 8 PAPER options and information further down below.
Be sure to Click on the ⊕ Symbol beside each paper-type and finish for further information about each paper type (i.e., remember to do this on your active link presented furter down below):
The FAA Print “Description” for Finish is this:
Our prints are produced on acid-free papers using archival inks to guarantee that they last a lifetime without fading or loss of color. All art prints include a 1" white border around the image to allow for future framing and matting, if desired.
The FAA Poster “Description” for Finish is this:
Our posters are produced on acid-free papers using archival inks to guarantee that they last a lifetime without fading or loss of color. All posters include a 1" white border around the image to allow for future framing and matting, if desired.
In other words, the “Finish” for both Prints and Posters on my FAA website is essentially the same … with the exact same “Finish” delivery option for both:
In other words, all of the other selections and delivery options for either Art Prints or Posters (on this website) seem to be identical whether one considers Size, Frame, Mat, or Paper for either product option (i.e., Print or Poster).
However, there can be a difference in production quality, depending upon which paper type is chosen for either product. See the link for more information about paper types below.
Therefore, one would assume that the selection of either a Print or Poster on this website would deliver the same high-quality result if the same type of paper is used for both products.
NOTE: It does not matter which image you open in ANY gallery … you can use any image on ANY product on this website.
Suppose that you want to make a religious “Poster.” Would it make a difference if you chose a “Art Print” instead of a “Poster?”
No, not on this website ... according to the information in the Fine Art America (FAA) “Descriptions.” Experiment … it’s great fun!
However, be aware that information from other sources indicate that “Prints” are superior to “Posters” because of production quality and types of ink used.
But … also be aware … that differences in quality can vary from company to company, depending upon the quality of their inks, papers, and printing devices.
People are often confused and concerned about the “paper” used in photographic printing. Once again, be aware that “Paper” is not used in “Canvas” printing processes.
The best way to get an idea of the photographic paper quality used by FAA, is to go to their explanations of what each type of photographic paper can do.
For example, I am going to provide a demo image for you to see below ... but there is an active link beneath it that you can find to play around with ...
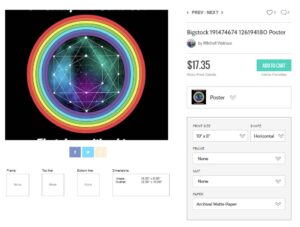
OK, here is the link that will be interactive for you to use:
Click > on this link: https://mitchell-watrous.pixels.com/products/bigstock-191474674-126194180-mitchell-watrous-poster.html
Click Go to the image and Click > Archival Matte Paper in the PAPER menu.
You should see 8 different paper options with a ⊕ symbol out to the right of each one. Just make a note that the prices for different types of paper used may be different … and affect the price accordingly.
Click > any PAPER option (i.e., Click > Archival Matte Paper) and Click > on the ⊕ symbol to read more extensive information about each of the PAPER OPTIONS.
In case you have not had the opportunity to do so yet, here is the order information for the important tutorial book that can help you through many rough spots on FAA websites:
How can you get the book? Once again ... here is the information:
| https://www.amazon.com/dp/B0BTFRP4P3 | [$4.97] eBook |
| https://www.amazon.com/dp/0981862845 | [$11.97] Print Book |
The print book is also very good ... and many people prefer to have a print book in addition to an eBook.
February 21st, 2023

Blog 12: Love Wood Prints
Images To Love on Wood Prints
Wood Print is another category similar to Acrylic Prints and Metal Prints. The backing for the WOOD PRINT image is on a solid foundation of wood (meaning … not on a piece of cardboard or foam).
This category of digital art uses a wood backing for the art. The wood is typically maple wood (of various thicknesses). The use of wood for your art backing will depend on your tastes, experiences, and uses.
Wood Prints tend to be cheaper than either Acrylic or Metal Prints. Depending upon the use of the print image, the user must make the decision to purchase a product that fits his or her intentions or uses.
Both Acrylic Prints and Metal Prints tend to have a higher image quality than Wood Prints. That does not mean those products would be any better than a Wood Print for the user’s intended purposes.
The options for Wood Prints are similar to the options for Acrylic or Metal Prints on Fine Art America.
In case the reviewer has not seen the options for either Acrylic or Metal Prints in previous blogs, I will review the steps for Wood Prints to speed up the review process.
In this presentation, I will use a different image for demonstration purposes:

Click > Wall Art (in the list that appears just to the right of larger image that appears on the website) ... you should then have this image and menu shown below:
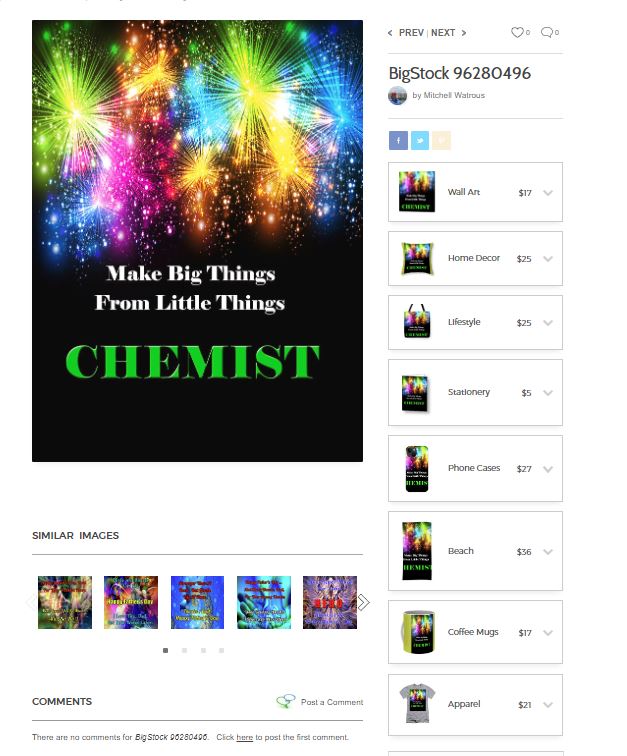
Note: The image above is just a demo. To get the image you need to work and build the product with:
When you click on Wall Art ... in the working image you just opened ... you should get another submenu in which you can find Wood Print.
Here is the link click series you can use to open the Wood Print in the image above (i.e., at this link: Chemist Menu):
Be aware that Wood Prints do not have “Frame” choices to go around these image prints:
Notice that you have two options for Wood Prints (i.e., PRINT SIZE and SHAPE … with four image Shapes: Natural; Vertical; Horizontal; Square).
Print Size – Size options will vary according to the Shape that is selected. For example, take a look at your large image to the left of the submenu … then, be sure to watch this image as you click on your four options below:
Click > Natural – This is the image appearance you will see when you first open this section (with five size choices). You will have 5 size options with Natural.
Click > Vertical – Keep watching, and you will see a slight change in appearance in the image (but, with only two size choices). You will have 2 size options with Vertical.
Click > Horizontal - Keep watching, and you will see a slight change in appearance in the image (but, with only two size choices). Make sure to observe if all of the image text words appear in the “Horizontal” orientation.
You've selected a cropped version of the artist's design. Please make sure that you're OK with the cropping before placing your order.
Mounting – Your image gets printed directly onto a sheet of 3/4" thick maple wood. There are D-clips on the back of the print for mounting it to your wall, using mounting hooks and nails (included).
Note1: There is almost no reason to put a wooden frame around this type of Wood Print art. It comes packaged with materials for mounting the Wood Print work.
Note2: When considering whether to purchase Acrylic, Metal, or Wood Prints, here are some observations from the literature … Acrylic Prints probably produce the biggest “eye-popping” art. Metal Prints are fantastic except that they tend to produce a “darker” image (so … consider that lighter images may be better in Acrylic Prints if that fits your application better).
Note3: While they can still be very acceptable, Wood Prints lack the image quality of either Acrylic or Metal Prints, but they are cheaper and may actually be more appropriate for the application purposes being used by the buyer (rooms with brighter lights or outdoor light).
Note4: Where would you use a wood art print? Well ... what about anywhere you wanted one. For some ideas ... they may be good any place subject to rust, corrosion, dust, or high humidity. May be good in rustic places like cabins, lodges, country or mountain hotels.
If you are looking for great images to put on Wood Print applications (or on other products) ... especially for cabins, lodges, or rustic settings, or just about anywhere else ...
Enjoy! Have fun searching the fantastic art that you can find for your project(s)!
ALTERNATE SEARCH PROCESS
Note: If you get lost in the process ... and cannot get the image you selected ... you can do this with just about any image or image product that you want to find and work with.
Let's say you found a painting called "Take A Breath" by Barbara Teller ... but you can't quite get the menu you need to explore and develop your choice for a Wood Print (Note: You must type * the + sign as shown in the search string shown below.)
Next, you will probably see a page pop up with several icons ... but you might not see what you are looking for (i.e., Wood Print). Follow a couple more steps and you will find the Wood Print option.
I know that we are not quite there yet (i.e., Wood Print) ... but in the next step you can find any option that you can use with this particular image (i.e., Take A Breath). What you have right now is the Art Print Menu ... but that is not what we want yet. For example, the Art Print menu looks like this image below (but this is just a stepping-stone to get to Wood Print menu):

To find the Wood Print menu we want to work with:
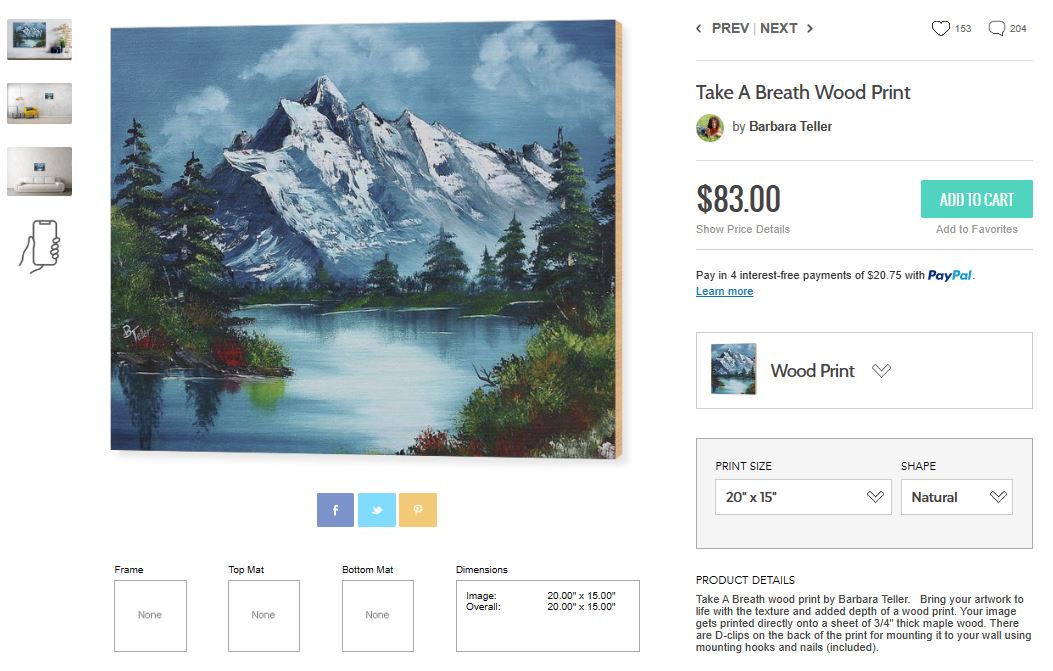
Note: See those four vertical images just to the left of the big Take A Breath image above? They can show what the Wood Print image can look like on a wall ... and the Wood Print wall image changes every time the PRINT SIZE is changed!
Be sure to get your copy of the tutorial book: Tips, Tricks, Tutorials Using Fine Art America ....
In case you have not had the opportunity to do so yet, here is the order information for the important tutorial book that can help you through many rough spots on FAA websites:
How can you get the book? Once again ... here is the information:
| https://www.amazon.com/dp/B0BTFRP4P3 | [$4.97] eBook |
| https://www.amazon.com/dp/0981862845 | [$11.97] Print Book |
The print book is also very good ... and many people prefer to have a print book in addition to an eBook.
February 21st, 2023

Blog 11: Which Print Is Better?
To know the differences ... you need to learn a little more about the products.
To follow along, be sure to log into https://mitchell-watrous.pixels.com and choose an image that you would like to work with ... or just use the example provided in the Practice Steps given further down the page.
There is NOT a contest between Acrylic Prints and Metal Prints. Both have their advocates, and both types of prints have appealing attributes.
No matter how we enhance an image, it should produce the desired effects we want to achieve in our finished product … and “dress-up” the location where it is used (i.e., home, business, work, lodge, etc.).
A visit to your local photographic shop should help you with some physical products to demonstrate the differences … which you cannot see in any internet articles or blogs.
SOME DESCRIPTIVE INFORMATION
First, here is some descriptive information about the production of FAA Acrylic Prints:
Bring your artwork to life with the stylish lines and added depth of an acrylic print. Your image gets printed directly onto the back of a 1/4" thick sheet of clear acrylic. The high gloss of the acrylic sheet complements the rich colors of any image to produce stunning results.
Second, here is some descriptive information about the production of FAA Metallic Prints:
Bring your artwork to life with the stylish lines and added depth of a metal print. Your image gets printed directly onto a sheet of 1/16" thick aluminum. The aluminum sheet is offset from the wall by a 3/4" thick wooden frame which is attached to the back. The high gloss of the aluminum sheet complements the rich colors of any image to produce stunning results.
MAKING A CHOICE
You will notice in both descriptions that each art print-form promises to bring your artwork to life with the stylish lines and added depth of an acrylic print.
And guess what? Both the Acrylic Prints and Metallic Prints can bring your artwork to life. But, depending upon the colors and digital image properties, you may prefer one art print form over another ... in the location you intend to use it.
However, the differences may be so slight (in many instances) as to make the choice between the two print forms to be insignificant.
Then, your options may boil down to a decision based upon three important factors:
The information presented here for Acrylic Prints is basically the same as for Metal Prints in this blog.
I will choose a different image to show you ... as we work with it in this blog.
For example, to get to this menu (for the image: Orange Rose):
Click > https://mitchell-watrous.pixels.com
Click > Collections > Coffee Mugs – General (in the Gallery list)
Click > Orange Rose [i.e., click on the image with the verse: You Cannot Hide Love When You Are In It ... OR ... Click Link >Orange Rose ... in case it's hard to find.]
Click > Wall Art (in the menu that appears just to the right of larger image of “Orange Rose”) ... and a larger submenu will appear beneath it for further selections.
If you are having difficulty finding the menu (or ... if you do not know what you need to find) ... it should appear as you see in the image below:
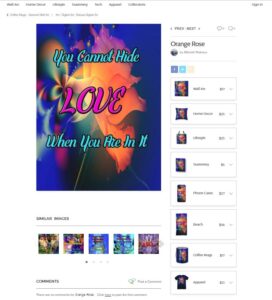
Note: This image above is a demo. You will need to click on this link: ... Orange Rose ... to bring up an image with active links that you can use to work with to make changes and/or modifications.
When you click on Wall Art (as described above), another submenu will appear with options you can choose, such as Metal Print ... or ... Acrylic Print). After you finish this blog ... you might want to go back and compare the information between Metal and Acrylic Prints.
Reminder: The menu pictured above in this Blog is not active. You must go to the website to activate any of these links (images) so that you can choose options and follow the directions for this image.
FOLLOW THESE PRACTICE STEPS
If you need the link again, here it is: Orange Rose
Click > Wall Art then, Click >Metal Print (Ignore any prices you see posted).
After clicking this link, you will have several options when you get to the next page. Be aware that Metal Prints do not have “Frame” choices to go around these image prints:
Notice that you have two options for Metal Prints: PRINT SIZE and SHAPE (with four image shapes: Natural; Vertical; Horizontal; Square):
Print Size – Size options will change with the SHAPE you choose for the Metal Print.
For example, take a look at your large image to the left of this submenu … then, be sure to watch this image change as you click on your four Shape options below:
Click >Natural – This is the image appearance you will see when you first open this section (with five size choices). You will have 5 size options with Natural.
Click > Vertical – Keep watching, and you will see a slight change in appearance in the image (but, with only two size choices). You will have 2 size options with Vertical.
Click > Horizontal - Keep watching, and you will see a slight change in appearance in the image (but, with only two size choices). Make sure to observe if all of the image words appear in the “Horizontal” orientation. If not, do not select it. In some images this can happen … so be careful if you choose that orientation. You will have 2 size options with Horizontal.
Click > Square - Keep watching, and you will see a slight change in appearance in the image (but, with only two size choices). You will have 2 size options with Square.
Mounting – Your image gets printed directly onto a sheet of 1/16" thick aluminum. The aluminum sheet is offset from the wall by a 3/4" thick wooden frame which is attached to the back.
Note: Most people do not put their acrylic or metal images into a frame … but just be aware … you can put an acrylic print or a metallic print into a frame if you have a situation where you would want one.
If you really want an additional frame around your image, you would probably get a better job if you took your acrylic print or metal print to a local frame dealer … especially if you have a particular situation where a frame would definitely enhance your image application.
Remember to look on the opening page of an FAA website ... https://fineartamerica.com/ ... and look in the SHOP Link ... and find over 50 product categories that you could put this image on ... or use any other image.
However, if you like this image (or any other image) ... when you have completed your adjustments ... just look down the page under ADDITIONAL PRODUCTS and find about 25 additional categories with this product already in it! And they are already set to be transformed by YOU with very little extra work ... just click on any image to open up its operational page!
In case you have not had the opportunity to do so yet, here is the order information for the important tutorial book that can help you through many rough spots on FAA websites:
How can you get the book? Once again ... here is the information:
| https://www.amazon.com/dp/B0BTFRP4P3 | [$4.97] eBook |
| https://www.amazon.com/dp/0981862845 | [$11.97] Print Book |
The print book is also very good ... and many people prefer to have a print book in addition to an eBook.
February 21st, 2023

Blog 10: Five Major Art Differences
There are at least five major differences between Canvas and Acrylic finishes:
“Canvas” finishes provide great quality for a digital art product at a slightly lower cost than “Acrylic” finishes.
The finish you choose for your digital art products depends primarily upon your finish preferences and your budget.
If you are not familiar with the differences in appearance between these two types of finishes, you might want to go to a photography shop and ask to see some samples so that you can see the differences between the two finishes.
You cannot really see the differences by looking at photography samples on a website. Plus, you can make better comparisons by seeing some physical examples in person:
Here is the menu you will find for any of (the 1300+) digital art images on this website. I will continue to use the Cathedral of Love image since you are probably familiar with it.
Reminder, to get to this menu (for the image: Cathedral of Love):
Click > https://mitchell-watrous.pixels.com
Click > Collections > Religious Themes … scroll down to the image: Cathedral of Love
Click > Cathedral of Love (i.e., click on the image)
Click > Wall Art (in the list just to the right of larger image)
When you click on Wall Art menu below, another submenu will appear similar to this one (this is similar for any image you choose from any of the Galleries on this website):

INTRODUCTORY NOTES BEFORE THE PRACTICE EXERCISE
It may be helpful for some reviewers if we take the time to go through some introductory points ... before we run through a practice exercise for you.
Note: The menu above is not “active” ... and may be a little difficult to see. You must go to the website to activate any of these links (images) so that you can follow the directions. Here is a direct link to this image ... which will be easier to find and to use for your practice:
https://mitchell-watrous.pixels.com/featured/2-cathedral-of-love-mitchell-watrous-brian-exton.html
After the link opens for you : Click > Wall Art ... then, Click > Acrylic Print
After clicking this link, you will have several options when you get to the next page:
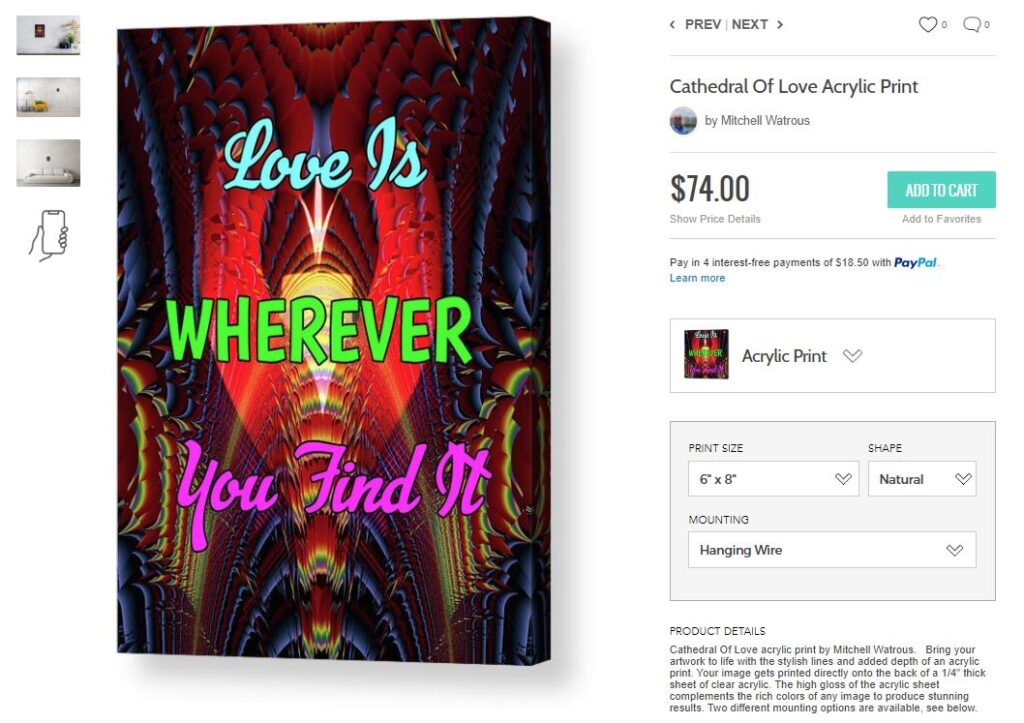
Note: Your finished image product will get printed directly onto the back of a 1/4" thick sheet of clear acrylic. The high gloss of the acrylic sheet complements the rich colors of any image to produce stunning results.
Be aware that acrylic prints do not have “Frame” choices to go around these image prints:
Notice that you have three options for Acrylic Prints:
ACRYLIC PRINT SIZE CHOICES
The print size you choose can change the appearance (or orientation) of the actual image size you choose ... but the number of sizes available will depend upon the SHAPE you choose.
Be sure to take a look at your large image to the left of the submenu … then, be sure to watch this image for changes as you click through your four SHAPE options below:
SHAPE CHOICES
Click >Natural – This is the image appearance you will see when you first open this section (with five size choices).
Click > Vertical – Keep watching, and you will see a slight change in appearance in the image (but, with only two size choices).
Click > Horizontal - Keep watching, and you will see a slight change in appearance in the image (but, with only two size choices). Make sure to observe if all of your words appear in the “Horizontal” orientation. If not, do not select it. In some images this can happen … so be careful if you choose that orientation (on any artists' websites).
Click > Square - Keep watching, and you will see a slight change in appearance in the image (but, with only two size choices).
PRACTICE EXERCISE
Make sure you have the Acrylic Print selected in order to go through this particular exercise. If not, here is a quick link for you to start again: Practice Acrylic
Click > Wall Art
Click > Acrylic Print
Choose PRINT SIZE > 12" x 16"
Choose SHAPE > Natural
Note: Check below your Acrylic Print setup ... and take a look at ADDITIONAL PRODUCTS ... where you may observe 25 different product application choices.
Just click on any of the icons in the Additional Products listing ... and you will find a set-up menu for each one that will allow you to make modifications and changes that suit your tastes.
And the best part is that you did not have to click through 25 different set-up menus to find what is already setup and waiting for you to review.
MOUNTING CHOICES
Click > MOUNTING
You will have two “mounting” options (Mounting is simple for either method.):
In case you have not had the opportunity to do so yet, here is the order information for the important tutorial book that can help you through many rough spots on FAA websites:
How can you get the book? Once again ... here is the information:
| https://www.amazon.com/dp/B0BTFRP4P3 | [$4.97] eBook |
| https://www.amazon.com/dp/0981862845 | [$11.97] Print Book |
The print book is also very good ... and many people prefer to have a print book in addition to an eBook.
February 21st, 2023

Blog 9: Shopping Magic Steps
Shopping Magic For Framed Art Prints
Let’s review the Wall Art series for Framed Prints to show you some tips and tricks you might need to know to get the most from your online shopping, or from physical store purchases.
Note: What you learn to do on these examples ... you should be able to do on most other artists’ products on their FAA websites (or ... even your own FAA website!)
We are going to start exploring some examples of hundreds of options for Print Frames. You will be amazed at what you can do with various colors and frames. You may not have ever imagined these possibilities before.
You can follow right along with these demonstrations on the following website since we know it best (copy and paste the website link to your browser if necessary):
Open this website: https://mitchell-watrous.pixels.com
Hover Mouse pointer > SHOP [Do NOT click]
Slide Mouse pointer > Wall Art [Do NOT click]
Slide Mouse pointer > Framed Prints [ NOW ... click on Framed Prints]
Search ... Keyword & Enter > Cathedral of Love ... Click >
Choose & Click Image > Love Is Wherever You Find It
I will explore this example for you. There are over 1300 images on this FAA website (But Note: by checking other FAA artists you may find millions of images you like.)
Today, I will go through the Framed Prints (in the Wall Art category) so that you can see how to perform all the actions in most of these options below: *
Note: Take your time … and repeat these instructions as many times as you want to … because there is a lot of good stuff you can find out here. Watch the frames and colors change around your image as you experiment.
Study the example below ... carefully! Change anything you want as often as you like ... even start over ... until you get it like you want it! You cannot break it!
To get the image below and play around with it ... Click > Cathedral Of Love by Mitchell Watrous (pixels.com)
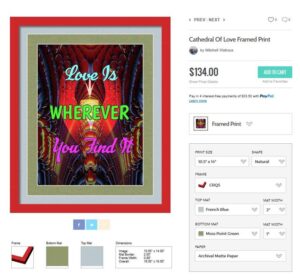
Please note the information about your Frame, Bottom Mat, Top Mat, and Dimensions displayed right below the image which you are designing. Any changes you make will also show up there, too.
On the next page ... I am going to go through all the options to show you what I did. You can use that as an example of what you might like to start trying on your own design. (Note: Try these examples on as many images as you like ... until you design something you like.)
The product you design and order will be a professional production (and comes with a guarantee)! Today, I will go through the Framed Prints (in the Wall Art category) so that you can see how to perform all the actions in most of these options:
Note: Use this link for help with colors in matching walls, rugs, furniture, etc.: ColorHexa ( https://www.colorhexa.com/ ). In this example: imagine a Framed Print to be placed on an Almond Colored Wall.
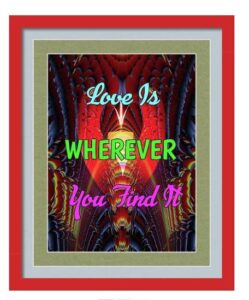
Note: My choices are shown in Bold below ... but please experiment as much as you like!
Picture Rag; Somerset velvet; Watercolor; and Metallic)
* Also looks good with various Black color frames ... try some to see what you think! (See black frame below.)
Note: Take your time … and repeat these instructions as many times as you want to … because there is a lot of good stuff you can try to find out what you like and take a look here.
You cannot break anything, but if you don’t like anything you did ... No Problem ... you can start all over as many times as you like!
Also, try as many Framed Art Prints as you like. There is no charge for playing all you want to ... and experimenting can be a terrific teacher that can make you much better at finding something you like.
Please note the information about your Frame, Bottom Mat, Top Mat, and Dimensions displayed right below the image which you are designing. Any changes you make will also show up there, too.
I am going to go through all the options to show you what I did. You can use that as an example of what you might like to start trying on your own design. (Note: Try these examples on as many images as you like ... until you design something you like.)
The product you design, and order, will be a professional production (and comes with a guarantee)! Today, I will go through the Framed Prints (in the Wall Art category) so that you can see how to perform all the actions in most of these options:
Note: Use this link for help with colors in matching walls, rugs, furniture, etc.: ColorHexa ( https://www.colorhexa.com/ ). In this example: imagine a Framed Print to be placed on an Almond Colored Wall.
Note: My choices are shown in Bold below ... but please experiment as much as you like!
Picture Rag; Somerset velvet; Watercolor; and Metallic)
* Also looks good with various Black color frames ... try some to see what you think! (See one below.)
Note: Take your time … and repeat these instructions as many times as you want to … because there is a lot of good stuff you can try to find out what you like and take a look here.
You cannot break anything, but if you don’t like anything you did ... No Problem ... you can start all over as many times as you like!
Also, try as many Framed Art Prints as you like. There is no charge for playing all you want to ... and experimenting can be a terrific teacher that can make you much better at finding something you like.

To improve your skills ever more ... be sure to get a copy of the tutorial book for these blogs. (Note: The eBook has many active links, and "Text-to- Speech" is enabled ... plus, the Print book makes an attractive library addition.)
How can you get the book? Once again ... here is the information:
| https://www.amazon.com/dp/B0BTFRP4P3 | [$4.97] eBook |
| https://www.amazon.com/dp/0981862845 | [$11.97] Print Book |
The print book is also very good ... and many people prefer to have a print book in addition to an eBook.
February 21st, 2023

Blog 8: Pro Canvas Art Steps
You can use all these little tips and tricks you see here ... to get the most from your online shopping ... or in physical store purchases. (Note: Do NOT pay any attention to any prices you see posted for a product in these examples.)
The Major Thing to realize right up front ... is that most people will have to go through these exercises several times before they can master the steps ... but that is normal with anything new like this!
Here is a brief outline of what to expect in this chapter:
You can follow right along with these demonstrations on the website below since we know it best (copy and paste the website link to your browser if necessary):
To begin ... open this website: https://mitchell-watrous.pixels.com
If you have no idea what you would like to use for your Canvas Print art project ... you can just browse the art until you see something you like ... then, click on it.
However, if you do know something to look for ... go to the top of opening page and you will find a search box like this:

If you know an artist’s name, you can type it in the search box ... and, if present, all that artist’s work will open up for you to review. For example, type in Mitchell Watrous and find out that this artist has over 1300 digital art objects for sale.
On the other hand, if you have the title of an art piece that might be there, type it in. For example, we might want to know if that artist has an art titled: Cathedral of Love. Type it in the Keyword Search to find out if it is there.
If it is there, Click > on that art piece you want to work with.
It is ... Click > on it ... and another menu page will pop up with more options for you:
Then, in the image above *[which you have opened on another web page] ...
Click > Wall Art ... and a new drop-down menu will appear (i.e., under Wall Art) ... like the one below (Note: Shown below, you should see a submenu under Wall Art that contains seven options (i.e., Canvas Prints; Art Prints; Posters; Framed Prints; Metal Prints; Acrylic Prints; Wood Prints):
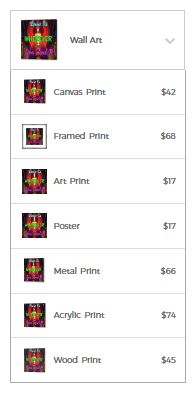
... then ... Click > Canvas Prints [*remember ... the menu which you have open on another web page.]
OK … so you are thinking … “That’s beautiful, but what can I do with it?”
That is probably the most important question you could ask.
Therefore, I am going to show you many things that you need to know to get the very best uses of any image(s) you choose for yourself ... or as gifts for others.
Some have already said that there should be an online course for $97 to $297. But … there is already a new comprehensive tutorial book for this particular process ... and it costs less than a coffee and donuts!
See the information at the bottom of this blog ... you can save yourself a lot of money while greatly improving your shopping skills!
By the way … do not pay any attention to any prices that you see listed with any of these images. Those are just “placeholder” prices that I wish FAA would not show.
Why? Because artists can offer various discounts from time to time for those that want to take advantage of any of these high-value, low-cost products.
Everybody loves wall art. It can do so much to improve and change any environment in homes, offices, pubs, or wherever it appears.
So, once again ... if you have not started yet ... let’s go practice! If you still have your image (as shown above) ...
Click > on the Wall Art link just to the right of the large image. If you lost your image, get another … I’ll wait … or just use the “quick” link I gave you above.
You do not have to go fast … and if you get confused (or totally astounded by the beauty of a product) … just take your time and play around with all the options you find.
See the screen shot the options you will find for Wall Art options for the image, Cathedral of Love (as shown above).
Cathedral of Love – Wall Art – Canvas Print Options Include:
Let’s take these one at a time. I will spend a little time on each option, but I know that many of my followers will spend a whole bunch of time exploring what they can do.
This exercise will introduce you to the many things you can do … and these are the things that most people almost always do not know about.
Note: Most of these Wall Art images come with pre-attached hanging wire, mounting hooks, and nails (when applicable) … and usually ships within 2-3 business days.
Let’s explore the process a little further:
Click > Canvas Print V – See the options below:
Click > Print Size Options
• 5 Sizes for print options
Click > Shape Options
Click > Canvas Wrap Options – There are five options in the “Wrap” section.
Note: This looks like a wealth of information … but don’t let that worry you … I am going to break it down into very simple snippets for you to consider. If you want the paper type finish, I will cover that later under Framed Prints.
But, for now, you can get through this very quickly. Anyway, if you want a “Canvas Wrap,” let’s get through the “tricky part … and that is easy.
If you need to start again, go back and choose the size you want.
Click > Wall Art; then Click > Canvas Prints; then Click > Print Size; … and remember, you have 5 Size options … just choose the size you want (i.e., let’s say you clicked 9 x 12 inches).
Then, before you leave that menu box, Click > Canvas Wrap. (You should notice three or four boxes beneath your “Cathedral of Love” image). The words may be very small ... so look carefully.
In the Dimensions box ... you should see these two bits of information when you click on the Canvas Wrap you selected (see the exception below):
Image: 9.00” x 12.00”
Overall: 9.00” x 12.00”
Exception: The 9.00” x 12.00” choice for “No Stretcher Bars – Rolled Canvas” will show a larger “Overall” dimension (14.00” x 17.00”) because the image is flat without stretcher bars. Some artists choose this option when they are planning to add their own mats and or frame to the artwork.
If not, go back and change it to the Print Size you want.
Now … here is a tip for you: Every time you click one of these five Canvas Wrap options … watch the image change its appearance. Look closely at the sides of the image.
This shows you the changes that might take place with the option you have selected (i.e., Mirrored Sides ... Black Sides ... White sides).
You might want to change the size or type of Canvas Wrap to better fit the use and effect you wanted.
(Note: If your computer decides it is lost at any time, you might want to click “Refresh or Reload.” Then, just go back to the Gallery you were in, locate your image, and click on it.
Here are the five options in “Canvas Wrap:”
Canvas Type
There are two types of canvas wrap:
Note: Click > ⊕ (to get an explanation of the difference between Gloss and Matte.
Frame
Let's take a quick look at a Canvas Print with these specifications:
Here are some tips to show you where you can start looking for fantastic art to use with Canvas Prints (i.e., also any other artwork category):
Go to this link: https://fineartamerica.com/
Tap > Search (i.e., in the search box)
Do Not click Keyword V
Enter > any word (in Search box) ... Mountains ... Tap > Enter Key
Browse > over one million “mountains art for sale”
Find an image you like ... or search another category ... Lakes or Beaches or Rivers, or Forests, Animals, Birds, People, etc.
When you find what you like ... go through the set-up, order process ... and get it!
NOTE: On many images, you can scroll down to a section called “ADDITIONAL PRODUCTS” beneath every image you view. You will see how the image looks on various products you can purchase or send as a gift with the current image. For example, when you Click > Canvas Print ... you can see a section below called "ADDITIONAL PRODUCTS" (which currently contains 25 products we can use and modify to our specifications).
However, on many products you will be able to place, or position, the image (and re-size it) on a product … but, this option is NOT available on Wall Art EXCEPT for Tapestries when it appears as an option in Wall Art.
How can you get the book? Once again ... here is the information:
| https://www.amazon.com/dp/B0BTFRP4P3 | [$4.97] eBook |
| https://www.amazon.com/dp/0981862845 | [$11.97] Print Book |
The print book is also very good ... and many people prefer to have a print book in addition to an eBook.
February 21st, 2023

Blog 7: Color Coordination
Color Coordination Practice Example
Get the little tutorial book listed at the bottom of this blog. It is one of the most helpful tools that you could have to navigate any website and make the most important and useful decisions that you need to make for all your color co-ordinations on FAA.
On this practice exercise, use what you have already learned in the previous chapters to practice using the Slider (i.e., to manage image and text) ... and the Color Wheel to play with border colors.
Here is the website again that you need to guide you through this dynamic process. Go to this website and follow along ... and you will see immediately why most people miss out when they go internet shopping.
Click here: https://mitchell-watrous.pixels.com
C O L O R Is the Part of All Your Products That Will Make Them or Break Them.
TOOLS: Image Size (Slider) and Color-Wheel + Shade-Tint-Tone Box
I added this part for my customers to practice color strategies on: Fine Art America Products with my website at https://mitchell-watrous.pixels.com ... (and on any other websites of FAA Artists).
These steps and techniques will allow you to make many color combinations that most people never even think about.
Who knows, in addition to FAA websites, you might even be able to use these strategies on other websites.
You may already be familiar with these "quick" steps to reach the color options for a product represented on our FAA website (i.e., Click > means to "Left-click" the next action, or link, word, or phrase in the steps below):
OK, what can you do if you look at the color application on the Throw Pillow (or any other object) … and all you say is, “Yuk, I don’t like that”?
First of all, you will probably notice that your “Color Wheel + Shade-Tine-Tone Box” is gone ... because you left that function
You decide that the previous box with all the color patches were better than what you could do for yourself … but you don’t see your little display of color patches anymore either.
You click around in that BACKGROUND COLOR box … but that “Color-Wheel + Shade-Tint-Tone” box that you were recently working with … that darn thing just keeps on popping up … but that is not what you want.
I know … I’ve done this myself. But, there is a quick solution if you only know where to look.
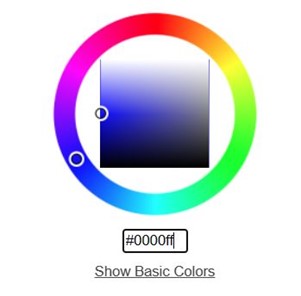
Look just below the “Color Wheel + Shade-Tint-Tone Box” and you will see a little, teeny, tiny, link that says: “Show Basic Colors” … CLICK IT … and you will be back to the place you want to be.
By the way, if you were working with the “Color Wheel + Shade-Tint-Tone Box” … but you did not like anything you were doing … and you did not know how to get back to your previous “Color Patch” box … look down beneath the “Color Wheel/Color Box” option and you will see a little, teeny, tiny, link that says: “Show Basic Colors” … CLICK IT … and you will be back to the place you want to be.
OK … let’s say that you were still not satisfied with the “color patch” choices either. You can actually go back and forth between the “Color Patches” and the “Color Wheel + Shade-Tint-Tone Box” until you get it like you want it
You can still go right back to the “Color Wheel + Shade-Tint-Tone Box” choice again just by clicking on the link you used before: Click > “Show More Colors” and it will be back to you.
If you still are not satisfied with the colors, you can click on the “Show Basic Colors” link again … and do this until you are satisfied … because you cannot break it.
Note #1: You want to be satisfied with your color choices on any of your products … and you want to be able to manage the most important aspect of your purchase … THE COLORS YOU WANT!
If you cannot get close to a color choice you want ... because you cannot maneuver the Color-Wheel + Shade-Tint-Tone Box to find a suitable color for you ... here is the best solution below.
Click on this resource ColorHexa (link: https://www.colorhexa.com/color-names ) and scroll through 700+ colors with the Hex color codes. Then, what can you do if you find a color you like ... but it’s not just quite right yet?
Here is a suggestion and solution to solve your problem:
Additional Information for you:
Even though you might not want the largest Throw Pillow size ... I suggest that you start working with that size so that you can see all of the options you might have.
If you want a Horizontal or Vertical Throw Pillow Size (which you can choose), you will have to choose the non-square size of 20” x 14” ... because all the other sizes are square.
If you start working on a larger Throw Pillow Size like 26’ x 26” ... but later you want 14” x 14” ... you might discover that the border has disappeared when you click the smaller size. What can you do about that?
Do you have to start all over? NO. Just go to the Slider Bar on the IMAGE SIZE ... and slide it to the left until your border reappears. You should still have the same border color you already like still selected.
In the next chapter I will review many of these processes again so that learning can be reinforced.
Later on, I will take the process all the way through to actually ordering a product ... and I will use one of the most requested products on the internet as the example ... Coffee Mugs!
How can you get the book? Once again ... here is the information:
| https://www.amazon.com/dp/B0BTFRP4P3 | [$4.97] eBook |
| https://www.amazon.com/dp/0981862845 | [$11.97] Print Book |
The print book is also very good ... and many people prefer to have a print book in addition to an eBook.
February 21st, 2023

Blog: 6 Color Circle Operations
This is one of the most vitally important blogs you will need to master in order to be an effective FAA website developer, operator or buyer. Review it as often as you need in order to make this a part of your basic skills.
This important blog is a little longer than my others ... with a lot of important details ... but it is easier to master than you think!
Be prepared to review this information until you are its master ... and once you get it ... you will know more about colors, shading, and tinting than most people in the world!
Here is what you need to know about products on FAA websites and available color selections ... but too many website operators may be depending on their visitors to already be adept at what they are doing ... and that is a BIG mistake.
Not all products have the same color choices available. Some products may have:
In general, Color Wheel + Color Box is NOT present on:
The Color Wheel + Color Box is usually present on most:
VARIOUS CATEGORIES
Some FAA websites might not contain a “Collections” category ... but if they do ... the images could be used on any option. Nevertheless, regardless of what some categories are called ... the image applications and management are basically the same across all FAA artists' websites.
However, remember that not all options will have access to the Color Wheel + Color Box as explained above for certain product choices.
NOTE: On some products the size of the image placement takes up all the border space ... and the BACKGROUND COLOR option with Color Patches does not appear ... until the image size is reduced.
The IMAGE SIZE ... is controlled by the Slider ... for a product. Move the Slider left to reduce the image size or right to increase the image size.
If the Color Wheel + Color Box is available for a product, it will not appear ... until ... the image size is reduced to allow the BACKGROUND COLOR option to appear.
When Image Size control is available on a product ... it is usually controlled by moving the Image Size Slider back and forth (i.e., left and right) ... to place it on a background of some sort.
IMAGE SLIDER OPERATIONS
Watch carefully when moving the Image Size Slider back and forth. To detect for the presence of color patches and/or the Color Wheel + Tint Box for a product ... DO THIS:
If a product also gives access to the Color-Wheel and Shade Tint Box ... you will see this link:
Show More Colors beneath the available BACKGROUND COLOR patches.
Here is an example to show how you will know what color access you have on a product [ i.e., these images are from FAA and should represent what you will actually encounter for use on any artist’s FAA website]:
BECOME A COLOR-WHEEL MASTER
This is one of the most important blogs you must master in order to be an effective FAA website developer, operator or buyer.
This important blog is a little longer than my others ... with a lot of important details ... but it is easier to master than you think!
Be prepared to review this information until you are its master ... and once you get it ... you will know more about colors, shading, and tinting than most people in the world!
Here is what you need to know about products on FAA websites and available color selections ... but too many website operators may be depending on their visitors to already be adept at what they are doing.
Not all products have the same color choices available. Some products may have:
In general, Color Wheel + Color Box is NOT present on:
The Color Wheel + Color Box is usually present on most:
Some FAA websites might not contain a “Collections” category ... but if they do ... the images could be used on any option. However, remember that not all options will have access to the Color Wheel + Color Box as explained above for certain product choices.
NOTE: On some products the size of the image placement takes up all the border space ... and the BACKGROUND COLOR option with Color Patches does not appear ... until the image size is reduced.
The IMAGE SIZE ... is controlled by the Slider ... for a product. Move the Slider left to reduce the image size or right to increase the image size.
If the Color Wheel + Color Box is available for a product, it will not appear ... until ... the image size is reduced to allow the BACKGROUND COLOR option to appear (but only if there is a background associated with the image in the category being used).
When Image Size control is available on a product ... it is usually controlled by moving the Image Size Slider back and forth (i.e., left and right) ... to place it on a background of some sort.
Watch carefully when moving the Image Size Slider back and forth. To detect for the presence of color patches and/or the Color Wheel + Tint Box for a product ... DO THIS:
If a product also gives access to the Color-Wheel and Shade Tint Box ... you will see this link:
Show More Colors beneath the available BACKGROUND COLOR patches.
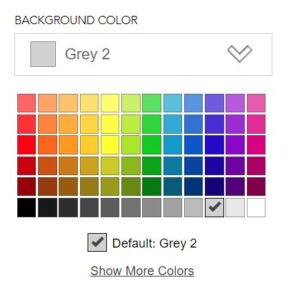
So that you do not get confused ... here is the color patch example again.
Remember, you will be able to use any of the Background Color patches you see (i.e., 72 shown above).
Keep in mind: The appearance of any color options usually means that the image does not occupy all of the available space on a background (i.e., if a background is available for the image you are using).
Notice: The Default block ... beneath the color patch examples ... is the original color of the product the website owner designed. That means you can go back to the default color if you did not like any of the colors you experimented around with (i.e., you will not lose the original color by experimenting).
If you do not change it with a different color patch ... or a color you generate with the Color Wheel/Color Box tool ... the default color will be the color of the product you order.
Don’t worry. Play around all you want to. You can always go back to the product’s Default color by clicking the link: Show Basic Colors (see image below) ... and you will see the original Default color patch beneath the listing of Background Color patches (see image above).
Just click it and you will have your original product and color back in front of you.
NOTE: If you DO NOT see the link: Show More Colors beneath the Background Color patches ... you will NOT have access to the Color-Wheel and Shade-Tint Box color choices.
But if you do see the link Show More Colors ... you will have access to all the color patches you see as well as all the colors you can generate with the Color-Wheel and Shade-Tint Box (i.e., over 16 million).
If you need some help on what colors you might like (and most people do), here is a handy link that may help you with color choices: https://www.colorhexa.com/color-names
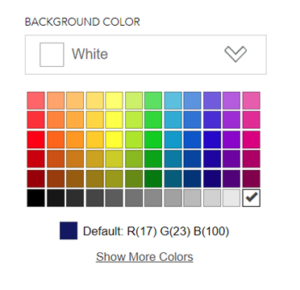
When you click the Show More Colors link (in the image above) ... this is the image below you will probably see:
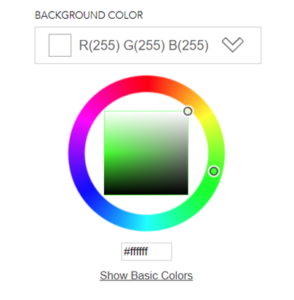
Note: In order to avoid future confusion ... in the image above, the RBG decimal for the Color white is (255, 255, 255) and the Hex Triplet is #ffffff is for white color. And equally important for you to know: the RBG decimal for the Color black is (0, 0, 0) and the Hex Triplet is #000000
When you click anywhere on the Color Circle, the little position indicator (i.e., the little 0) will move to that position. This “anchors” a color position you want to shade or tint some more (i.e., inside the Shade-Tint Color Box).
When you click anywhere inside the Shade-Tint Color Box, the little position indicator (i.e., the little 0 ) will move to that position. You are actually shading and/or tinting a color you have already “anchored” on the Color Wheel.
Note: Any color that you have “anchored” on the Color Wheel can be shaded all the way to Black or tinted all the way to White. Experiment ... and you can prove this to be true for any color on the Color Wheel.
OBSERVE CHANGES CAREFULLY
This is what you can observe in the image above when the Color Wheel/Color Box is being used:
Reference for color ideas and Hex codes: ColorHexa or copy and paste this link in you browser window: https://www.colorhexa.com/color-names
Note: If you are using the print book of this edition, type this link into your browser for information ... and you can add the Hex triplet (i.e., the code) into the Code Box to put that color on your FAA product when you are trying to make a color decision for your product.
Color Circle / Color Box Operations:
Reminder: As an example, use our Fine Art America (FAA) website to follow along with these directions since we know it best: https://mitchell-watrous.pixels.com
Click > https://mitchell-watrous.pixels.com to get started and to access the products on our website. Here is a brief outline of what to expect:
Note 1: Play around with these options all you want to ... you cannot break anything!
The little 0 will stay in the same position inside the Color-Box even when you change to a different color on the Color-Wheel to see what it looks like.
The full color (or color with a balanced shade and tint) is usually found by placing the little 0 about half-way up the left side of the color-box.
To see what this position looks like ... type in the hex code for the color red #ff0000 ... in the rectangular Code Box beneath the image [note: use zeros NOT the alpha letter o ].
Moving the little 0 from that position will add or subtract shade or tint, depending upon which direction you move the little 0 inside the box.
Don’t be afraid to experiment … but just remember to leave the little 0 inside the Color-Box in the color position that you desire to have on your product.
Note 2:
Each time you make a color change on the Color Wheel and Color Box, you can see the color change occur in two different places:
You will also see the value for Red-Green-Blue (or RBG) change inside the “Background Color” box.
Note 3: This is part so important ... review it until you totally understand it!
OK ... this is really easy to understand ... once you take a deep breath ... relax your jaw muscles ... unclench your fists ... stop squinting your eyes ... and exhale with a smile. You got this! And ... with a little practice ... you will own it!
An understanding of what happens within the Color Wheel/Shade-Tint Box can greatly increase your efficiency in finding and evaluating the color choices you can discover (... over 16 million can be a little overwhelming).
THE SHADE/TINT BOX
This box is the key to exploring the various colors you can find:
After reviewing the four steps above ... try this:
Just remember … you can go back and change any color you do not like before you order it.
TROUBLE SHOOT COLOR PROBLEMS
For: Color Problem on Color-Circle / Color-Box
For example: Solid Black color … or … No color in THE BACKGROUND COLOR box (or on the product image).
You are trying to change the color for the product on the Color-Circle, but it will not change no matter what you do.
You have clicked all over that darn Color-Circle, but the little BACKGROUND COLOR patch stays a solid black color … and cussing doesn’t even help.
Look down inside the Color-Box (i.e., remember, it’s inside the Color-Wheel) and you will probably find that the little 0 is somewhere inside the Black color inside the Color-Box ... or on the bottom horizontal line.
Just put your little 0 back inside the Color Box (on a color), and click it with you left mouse button. You will probably get an instant color change in your BACKGROUND COLOR box.
The opposite problem occurs when the little 0 is somewhere along the top horizontal line of the little Color-Box in the “white” color area.
No matter how much you click the Color-Circle (and cuss), that darn little color patch inside the BACKGROUND COLOR box stays colorless … or white.
Use the same solution for correcting a “black” color. Just put your little 0 back inside the color box (on a color), and click it with you left mouse button. You will probably get an instant color change in your BACKGROUND COLOR box.
This is one of the most important blogs you will need to master in order to be an effective FAA website developer, operator or buyer.
This important blog is a little longer than my others ... with a lot of important details ... but It is easier to master than you think!
Be prepared to review this information until you are its master ... and once you get it ... you will know more about colors, shading, and tinting than most people in the world!
The book offered below has expanded-additional information about the Color-Wheel + Shade-Tint-Tone Box.
In case you have not had the opportunity to do so yet, here is the order information for the important tutorial book that can help you through many rough spots on FAA websites:
How can you get the book? Once again ... here is the information:
| https://www.amazon.com/dp/B0BTFRP4P3 | [$4.97] eBook |
| https://www.amazon.com/dp/0981862845 | [$11.97] Print Book |
The print book is also very good ... and many people prefer to have a print book in addition to an eBook.
February 21st, 2023

Blog 5 - Color-Circle
Before presenting a lot of tutorials ... it might be helpful to understand what color tools are being used to modify an image border to get something that we really want to purchase.
Here are some important points to remember about FAA color options:
*On some products the Background Color is presented on a different layer than the image (i.e., some Carry-all Pouches with flowers or designs) ... which allows the images to “rest” on Background Color.
We should run through the color options you can have with FAA images so that you can make easier decisions about the use of the color tools:
What are Color Mats?
Color Mats are usually found in the Wall Art category. The number of colors patches for Color Mats can vary ... and are often related to the Frame style chosen for the Framed Print. Note: Some Prints ... without frames ... can also have Mat choices.
Where do we find Color Mats? We usually find them in the Wall Art category. Here is a short tutorial on how to find them (using the same Coffee Mug example):
Seem like a lot of steps? Actually, once you go through these steps a few times ... it becomes really easy. Be sure to go back and forth to play with Top and Bottom Mat sizes and colors. Note: Mat color choices can vary with the style of Frame you choose.
In case you are wondering what our Image looks like with the Top and Bottom Mats we chose in the tutorial above ... here it is for your review:

Note: We will go into a few more advanced steps in Chapters 5 – 6 - 7 & 9 in the use of the Color-Wheel + Shade-Tint-Tone tools.
What are Color Patches?
Not all image categories will have color patches for you to use. When you do have the Color Patches option ... you may also have access to the Color Wheel / Shade-Tint-Tone Box (Note: not all categories have these two options together (i.e., this is NOT an option in Apparel category).
In order to find out if you have access to both the Color Patches and the Color-Wheel + Shade-Tint-Tone Box options ... you can move the Slider Bar all the way to the left ... as shown below:
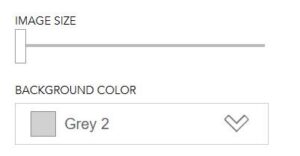
THEN ... Click > LEFT Mouse (anywhere inside the BACKGROUND COLOR box ...
You should quickly populate your page with the Color Patches if you have access to the Color-Wheel + Shade-Tint-Tone Box as shown below (then Click > Show More Colors):
Using border colors can be confusing unless you know a few differences. You do not have to know color theory in order to use the color options on FAA, but you should know that:
What is the Color Wheel + Shade-Tint-Tone Box?
It looks like a rectangular box within a colored circle ... and has a code box beneath it ... like the figure shown below (Note: Color Blue with Hex Triplet [ #0000ff ] shown in code box:
Color Wheel + Shade-Tint-Tone Box Tutorial Steps (with Coffee Mug example): *
*Basic information for color management and selection ... continue chapters for more advanced information and techniques on using the Color-Wheel + Shade-Tint-Tone Box.
Most of us need help to make color choices: ranging from definitely ... to maybe ... to absolutely not. FAA artists are great at providing wonderful images for us ... but they cannot possibly show us all the available color combinations (millions of choices).
However, one of the great things about Fine Art America is that they provide visitors with the tools they need to find and view all the combinations that the artist cannot possibly show us.
Once visitors learn how to use the tools ... they can spend hours exciting themselves with possible combinations that can match just about any environment where we want to use our product choices.
Here are a couple of excellent links ... loaded with useful color information ... that can help us to decide what we think looks best on our product: *
*If you will take your time to explore those two links above ... there is not much you cannot do with the Color Wheel + Shade-Tint-Tone Box ... but here is a link to learn more about color theory (https://blog.hubspot.com/marketing/color-theory-design).
How can you get the book? Once again ... here is the information:
| https://www.amazon.com/dp/B0BTFRP4P3 | [$4.97] eBook |
| https://www.amazon.com/dp/0981862845 | [$11.97] Print Book |
The print book is also very good ... and many people prefer to have a print book in addition to an eBook.
February 21st, 2023

What are the three major problems encountered for shopping in walk-around stores?
1 Not enough choices
2 Not enough sizes
3 Not enough colors
Fine Art America can be a big help in solving all three of those problems. They have:
1 more than a million artists with websites and offers;
2 multiple size options on most products;
3 color patches and Color-Shade-Tint-Tone options for over a million colors.
The first problem is easy to solve. Currently, there are billions of choices in at least ten Popular Categories with more than 50 products:
1 Wall Art
2 Art Media
3 Home Décor
4 Lifestyle
5 Beach
6 Tech
7 Men’s’ Apparel
8 Women’s Apparel
9 Youth Apparel
10 Stationery
Second, almost all products will have multiple sizes ... and many will have different orientations (i.e., natural, vertical, horizontal, and square).
Third, with more than 16 million color choices ... matching your favorite colors will be fantastic!
There are two major tools that can be used to improve our selections of products on Fine Art America.
The first tool is called IMAGE SIZE. Most people refer to it as the SLIDER ... because it can slide left or right with the Mouse Button to decrease or increase an image size and border on a product (i.e., the relative relationship between any border present and the actual image).
The Mouse Button can also be used sometimes ... to move an image up or down for placement on a product ... during the sizing and placement process (i.e., when using the Image Size option)
IMAGE SIZE (i.e., SLIDER BAR)
A few more details about the Image Size option could be helpful for many people who have not learned to use it to their advantage yet. Note: It can be found in almost all categories, except NOT in Wall Art.
The IMAGE SIZE (on a product) is controlled by the Slider ... located on a horizontal line. Move the Slider left to reduce the image size ... or right to increase the image size. See the image below (i.e., Slider Bar on the horizontal line).
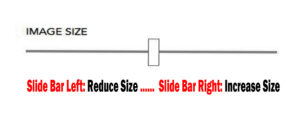
You can control three things on most products with the IMAGE SIZE option:
1 The Image Size on the product;
2 The Border Size on the product. *
3 Completely remove Border from some products (i.e., move Slider Bar to the right).
* Note: On many products (i.e., greeting cards) ... decreasing the border size will increase the images size ... and increasing the border will decrease the image size. But on some products (i.e., some Carry-all Pouches) the image size and border size do not influence each other because they are in different color layers.
For example, you can completely remove a border on a greeting card and fill the card front with just the image by moving the Slider Bar all the way to the right (i.e., the border is completely absent on the card).
You can experiment with the Slider Bar option on many products in most categories (except, NOT in Wall Art) to see which options or sizes you prefer for the image and the border.
When we get to color options you may find that the border color you choose could have a big impact on the size of the background (i.e., or image size) that you want to use for best effect.
Image Size Slider Options/Uses:
Let’s run through a tutorial for the Image Sizer (i.e., Slider) to show how this tool can be used effectively on products where it is available.
I am going to choose one of my coffee mugs because it has both text and an image to work with.
The image I am going to use is on my own website ... but this process should work the same on hundreds of thousands of other FAA artists’ websites.
Slide the Slider to the left to decrease image size (on any product where you have this option) ... and to the right to increase the image size.
In many cases, the Slider may also be used to position the image on the product as well (i.e., don’t be afraid to experiment with your images to find out what will work on any product).
You can use the Slider to position the image on the cup ... and can move some text from the image that appears on the cup (and notice two of 16 million possible coffee mug colors we talked about).
Note: I have found only 17 web-safe colors in the FAA Color Patch display ... but I have not personally experienced any difficulty when ordering products from Fine Art America when using them.
NOTE: The Image Size Slider is active on many products on most FAA websites ... EXCEPT ... it is Not available on most Wall Art options.
⇒ Click > https://mitchell-watrous.pixels.com/
⇒ Click > Collections
⇒ Click > Coffee Mugs – Card Games
⇒ Click > Ambush Power Poker [Image with Ace of Heart]
⇒ Click > Coffee Mugs $17 V
⇒ Click > Coffee Mug $17
⇒ Click > inside SIZE box
⇒ Click > Small (11 oz.) ... or Click > Large (15 oz.)
You should notice several things about the image for Ace of Hearts Coffee Mug:
1 There is advertising text above and below the image.
2 The image text advertises a new Poker book (above) and the author (below).
3 The Background Color is Grey 2 (See color tutorial in Chapter 5 to change that.)
What are our Image Size options? We have several simple options. Just put the mouse button over the Slider Bar and hold it down ... and the Unwrapped Image below is what you should see:
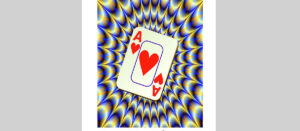
This Unwrapped Image above will show you what is happening on your coffee mug. When you put the mouse pointer over the Slider Bar ... and while holding down the Left Mouse button .... move it left or right to see the image sizes change. Release the mouse button when you have the image you want.
We can accept the coffee mug as shown below in the Unwrapped Image without changes. All the original text and image will appear on the cup just as you see it in the image below when you release the mouse button from the Slider Bar:
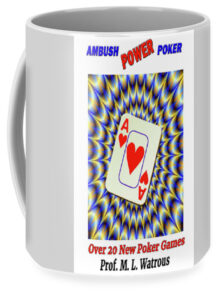
We can slide the Slider all the way to the left ... and this is what we see on the coffee cup below ... the basic background border color (Grey 2) of the cup with a very small image in the center.
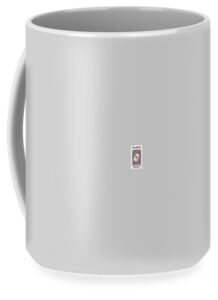
We can slide the Slider all the way to the right ... and this is what we see on the coffee cup below ... the basic background border color of the cup with a very large, over-lapping image in the center.
You can slide the Slider Bar left and right until you center the image on the Unwrapped Image indicator ... without any text ... as shown below:

Then, your coffee mug should appear as shown below ... when you release the Left Mouse button.
OK, what if we would like to have the only the top or the bottom text appear on the coffee mug? For example, what if we wanted to use this coffee mug for advertising purposes?
Go back to the coffee cup image you just created on the website ... and you can make those adjustments on the image of this coffee cup. Just to make sure there is no confusion ... here is the one you just created (or, go back and generate it again):
Click > Coffee Cup Image ... and hold down the left mouse button ... and it should display the corresponding Unwrapped Image for you.
With the left mouse button depressed ... slide the image up or down (i.e., on the Unwrapped Image) to get the text you want to display on the coffee cup ... and then release the mouse button when you have the image and text positioned where you want it.
Note: Play around with this until you get your image and text positioned where you want them. You might have to click or double click the image after you have positioned and released your mouse button (i.e., some computers may respond differently ... but you should be able to get this to work for you with some experimentation).
Here are two examples of what you can do with this technique:
We can experiment with changing Background Colors on the coffee mug ... millions of colors!!! More about this is covered in Blog 5.
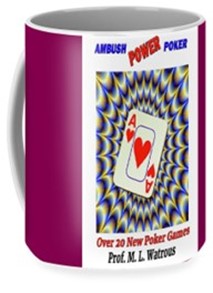
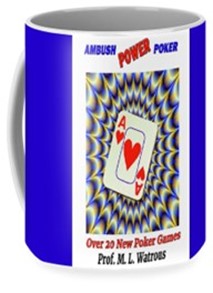
How can you get the book? Once again ... here is the information:
| https://www.amazon.com/dp/B0BTFRP4P3 | [$4.97] eBook |
| https://www.amazon.com/dp/0981862845 | [$11.97] Print Book |
The print book is also very good ... and many people prefer to have a print book in addition to an eBook.
February 21st, 2023

Quick Start
Some people already know this ... but many do not know it ... but the information below could be visitors' gateway to many of our artist's websites.
In a hurry to get started putting your own images on things you want them on ... without having to make your own website?
It does not matter if you are a brush artist, digital artist, buyer, seller, photographer, website owner ... or none of those ... Fine Art America (FAA) has a lot to offer everyone in some aspect of their life.
Really Easy ... to make your own product designs on FAA ... for yourself ... and as gifts for others!
What types of images can you use on products you want to make? Actually, more than you might think.
You can use any photos, images, and graphics you have personally created and stored on your own equipment (and even your own photos you have stored on your social media, or photos you have the rights to which you purchased from a commercial photo source).
Basically ... you can use your own art, drawings, paintings, and photos you have made with you own equipment (i.e., cameras, cell phones, laptops, etc.) ... and stored on your own PC, laptop, or cell phones. That includes photos you purchased the rights to from another source (which also includes the fantastic artists’ work from FAA).
These are types of art categories can you make (or create) with your own images: *
Wall Art ^^^ Home Décor ^^^ Lifestyle ^^^ Apparel ^^^ Stationery ^^^ Phone Cases ^^^ Beach ^^^ Miscellaneous
*All products are manufactured within 2 - 8 business days, depending on the product, and can be shipped to any destination in the world (from a company called Fine Art America) ... and without having to have a website of your own.
This is so simple ... let’s just do one right now:
Click > FineArtAmerica
Click > CREATEClick > Upload Your Image * ... and this action window below ... will pop up for you to use:
*Note: You can use any image you have the legal rights to use (i.e., check those you purchased).
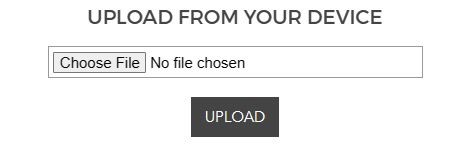
Click > Choose File in the image window that pops up (i.e., see above).
Search > your image files and choose the one you want to upload.
Click > UPLOAD
Note: Then a page with 28 AVAILABLE PRODUCTS popped up (could be less depending on the image).*
*That means I could have used any one ... or all ... of those products with my image on it!)
Then ... I Clicked > Coffee Mugs (i.e., with my I Love You image on it).
Note1: You should see a section: AVAILABLE PRODUCTS when your image uploads. Those are all products on which you can place your current image. Just Click on any of the available images to open it up and start working on it!
Note2: Not all of your images may upload (i.e., too large, wrong file format, etc.) ... experiment!
When you click on your product with your image, you should get the file you need to work with for your styling ... and then order it. Your styling-order page may look like this:
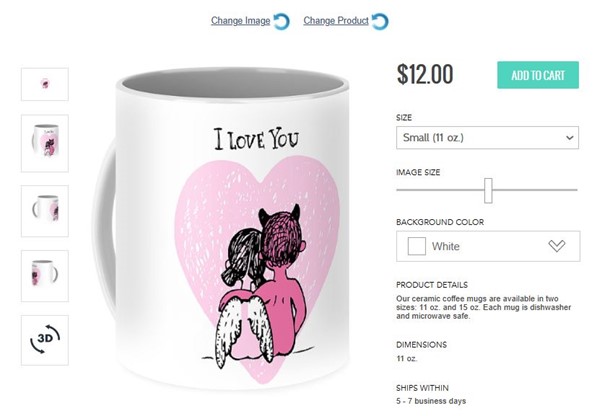
Note: See commands above the image on the web page: You can Change Image Q or Change Product Q the image is displayed on. Experiment! Have fun! You cannot break it!
Also, each image could have a different number of Available Products ... on which the image can be applied. Experiment to find what works best for you (and that includes any images you find from millions of artists on FAA.)
The amazing part about this section is that it will show you every FAA product upon which you can use the image you just uploaded. For the demo image I just uploaded * ... shown below ... I could put it on 28 different FAA products if I wanted to!
*Image purchased from BigStock ... but could have been from an FAA artist ... my images, or anywhere.

You can do some really amazing things with these options ... and the more you play around with them ... the more you will realize the amazing power you have discovered. (Note: If you want to send 20 of your coffee mug products with images ... as gifts ... you can put a different color on each one ... or on just about any product you choose!)
Suppose that my wife and I would like to have this image on two personal coffee cups ... one for her and one for me ... with our favorite, personal colors. Can I do it? Yes! See two difference coffee mugs below.
Her color is Fuchsia and mine is Blue. (Took me less than 5 minutes.) Note: With the color patches included and the Color-Wheel + Shade-Tint-Tone Box option ... I could have the choice of choosing over 16 million different colors!
See for yourself below:
OK ... you might be asking, “How do I put colors ... and do all the other stuff (i.e., sizes, etc.) on various products ... with the images I upload?”
Instead of hooking readers with an expensive "How To" video tutorial course costing several hundred dollars ... I produced a "starving artist" tutorial eBook, which costs less than a coffee and donuts (i.e., order information at bottom of page.).
The beauty of this book is that it provides tutorials on how to do just about everything ... for example, how to do most of the simple, common things that people usually want to do with their images ... and with their product choices.
The book also includes more advanced tools for those who may be interested (at no extra charge) going as far as they want to. For example, if you want your own website, or find out how to join, and do many other things ... there are links to guide you to those areas.
Annoying gift shopping (caused by the lack of imagination) may become a thing of the past ... because you can do many things with these new options for gifts.
Based upon the thousands of things you can now learn to do with Fine Art America’s websites by truly gifted artists ... your biggest problem may come down to determining which of these outstanding options you want to use.
My recommendation is that you get the short tutorial book and find the time to go back to the beginning ... and just casually stroll through all the options you can exercise ... find out for yourself how easy this is to do!
Do NOT hesitate to contact your favorite FAA artist with any questions you may have about their art ... and any other options they may have for you (i.e., volume sales, etc.).
There are definite advantages to joining ... especially if you want to sell art on line ... just click or copy and paste this link: https://fineartamerica.com/sell-art-online
But ... what if you want to consider a free account ... can you get one?
Yes. Just copy and paste it or click > https://fineartamerica.com/membershipplans.html ... and compare plans.
If you would like to see some videos, Click > https://fineartamerica.com/videos.html ... or copy and paste the link if you have the print book.
How can you get the book? Once again ... here is the information:
The print book is also very good ... and many people prefer to have a print book in addition to an eBook.
February 20th, 2023

Blog 2: It's Not Magic
But some of these world-class artists can certainly make it seem like the world is full of magic.
If there was ever anything hidden in plain sight ... you don't need magic to discover it.
Why? Many people see it ... but only a few people seem to know how to access the information on FAA websites and use it.
Most people are completely unaware that they could dramatically change their lives by the colors they choose to use everywhere … because colors affect everything we do … and in every second of our waking lives.
In my opinion, FAA is the world’s largest market for beautiful, state-of-the-art gifts and high-quality merchandise that can be delivered worldwide … or right to your address (or any place with a physical address worldwide).
They currently have 16 worldwide production companies that have been delivering products since 2006 from hundreds of thousands of various artists and iconic brands. You are going to be thrilled with the quality of the products delivered by FAA.
While this will not be a comprehensive PhD-level presentation … I can assure you that you will learn and know more than probably 90% of the world’s online shoppers.
You can become an outstanding online (and physical store) color shopper … to zoom ahead of your competition. Life, after all, is a competitive event (you know … jobs, love, success, and everything else).
How to Become an Outstanding Online Color Shopper is something that you absolutely must do … and there are some “free tools” to help you do it … in this presentation.
The tools in this book are targeted for FAA website owners, users, and buyers. Why? Because these tutorials are needed by all three groups for more in depth use.
But, the most important group that can make the most use of this book are the buyers.
Why? Because they need the information in the book more than anyone else ... because they can make thousands of modifications to the end-product art than the artists and website designers can offer them.
Many online retail merchants are becoming aware of the need to provide their shrewd customers with a way to make better color choices for all their products (i.e., art, clothing, wall paint, furniture, etc.).
I used to go nuts trying to match the colors for the clothes I wanted to wear for “this or that” occasion or special event ... or I could not get the right colors for picture frames ... or much of anything else.
Ever get that “gnawing feeling” that your clothing combinations look more like a pizza (with everything on it) … and you would rather eat it than wear it?
This presentation is intended to introduce people to the methods they can use to choose find and use colors and products on FAA websites.
Whether we like it or not, all our successes depend on using our best colors and combinations of colors on everything we wear or use.
Most people need a lot of help in the use and application of colors. The main areas are in online shopping and physical retail stores.
The “birds and the bees” (and just about all other animals) not only use colors but they are also influenced by the appearance of colors. Colors can influence and guide animals for food, mates, danger, recognition, survival and possibly migration.
The animal kingdom appears to be more overtly influenced by colors than the human kingdom. The animal kingdom seems to be more “hard-wired” to colors and their variations than humans … and animals do seem to have a repertoire of “built-in” responses.
For example, the uses and applications of colors for human activities are not always obvious, and they can also be subtle as well as suggestive. The strategic use of Shades, Tints, and Tones can be very effective ... and you will learn some tricks to get those.
Millions of dollars are spent in marketing and advertising for uses of colors and color combinations to appeal to human emotions, preferences, and purchasing activities.
It does not matter if you are a “last minute shopper” or if you are an organized “shopping machine” … everyone needs help … especially online shoppers.
Men don’t know it, but they are just as much influenced by colors as women are. I have learned that it is not “cool” to show up at a funeral wearing Camo shorts, an Hawaiian shirt, a Panama hat, and green flip-flops. And, nope, wearing Ray-Ban sun glasses will not make that a good combination either.
Although I cannot cover everything under the sun related to colors … and that would be a bad idea anyway … I will try to cover as many ideas and applications as possible to help people with things that impact their lives and the products they buy.
Online shopping websites drove me and my wife into the “dark forests” of the mystical color “shades, tints and tones” ... and ever-shifting “color patterns.”
Upon emerging from those confusing kaleidoscopes of color patterns, we were no closer to satisfaction than to the best goodies in the Garden of Eden.
It did not matter what we were shopping to find … no “Tree of Color Knowledge” of any kind could be found anywhere.
Plus, shopping online often offers far more color selections and products than you could ever find in a “physical” store.
Also, online stores are beginning to realize that if they do not give their customers what they are looking for … many customers will slap that return label on a shipping box faster than a lightning strike.
Therefore, tricking customers into purchasing something is a foolish idea (hint: always look for that “money-back” guarantee before buying anything … anywhere).
Colors are so important; it is vital to get them right ... on everything!
Later on, I will show you how to get color “shades” and “tints and tones.” I’ll even reveal to you what those “tones” are all about … and how you might use them.
Many websites have various color-selectors on their websites … but most of them do not take the time to tell their customers how to use them. The Color-Wheel / Shade-Tint-Tone tool is an amazing instrument ... and you will love the tricks you can do with it.
Where color selectors are available on a website, knowing how to use the “shading” and “tinting” and “toning” parts of these color selectors is vital to a great color outcome on your product or gift.
FAA has a great selection of color patches ... but their Color-Wheel with a Shade-Tint-Tone Box is almost magic ... and I am going to show you exactly how to use it (and which parts are related to Shades ...and ...Tints ...and Tones).
Statistically, you can produce over 16 million color variations with that magic system.
Some of you are probably saying … “OK, what colors do I really want? How do I figure that out?” And, you would be exactly right in asking those questions, and I have some answers for you.
In the meantime, go to these links and save them on your favorites (i.e., on your PC or mobile devices):
Go there and be amazed at over 740 colors and names you can find (to use later) ... and to give you more ideas about colors you did not even know existed ... plus 216 Web-safe colors.
Hint: If you find a color code you like on those websites ... you can even copy and use them on the FAA Color Wheel’s Code Box (i.e., the hexadecimal code).
Two of the most helpful things that buyers and visitors can use on these websites is the knowledge of what is actually going on these websites ... and what tools can be used to help them get product(s) dressed up and modified to suit their needs.
To get started with any product section on an FAA website ... knowing what tools can actually be used can be most useful in helping a customer get started correctly.
For example, the most important design tools for use on FAA websites are these:
Listed below is the current, general overview of the Fine Art America categories ... and the possible tools that can be used.
These are dynamic business-art websites. And that means that almost any product in any area on the FAA parent website can be in constant “update” mode:
Wall Art [Except for Tapestries: no color options or Slider options available.] *
*These are the limitations that apply for an image used on the products in the Wall Art category ... but these restrictions/options can change when the image is used in other product categories.
Art Media [NO color or Slider options for an image used in Wall Art.]
Home Décor [All color patches, color wheel, and Slider options active in this category.]
Lifestyle [All color patches, color wheel, and Slider options active in this category.]
Beach [All color patches, color wheel, and Slider options active in this category.]
Tech [All color patches, color wheel, and Slider options active in this category.]
Men’s Apparel [Color patches and Slider active ... one exception noted below.]*
*Face Masks [Uses Slider ... with Color Wheel for Background color ... no color patches]
Women’s Apparel [Color patches and Slider active ... with one exception noted below.]*
*Face Masks [Uses Slider ... with Color Wheel for Background color ... no color patches]
Youth Apparel [All use color patches and Slider.]
Stationery [All color patches, color wheel, and Slider options active ... except one* .]
*Stickers [Transparent or white background only ... no Slider or color options.]
How can you get the book? Once again ... here is the information:
| https://www.amazon.com/dp/B0BTFRP4P3 | [$4.97] eBook |
| https://www.amazon.com/dp/0981862845 | [$11.97] Print Book |
The print book is also very good ... and many people prefer to have a print book in addition to an eBook.
February 19th, 2023

Blog 1: ADVANTAGES FOR YOU
Things You Would Never Know About Fine Art America (FAA) ... unless someone told you.
The following table is a list of Subjects and Subject Links related to Fine Art America (FAA) Websites. Note: FAA in the presentation refers to Fine Art America.
Do not worry about having to learn everything in this table. Much of this information is nice to know in case an artist, buyer, or website owner needs to know more about certain aspects of FAA uses and options.
The information in the table below is both easy to understand and nice to know.
Take your time and do a quick overview of the possibilities. The reason I did not present this information as a tutorial video is that many people like to review ... and stop ... review some more ... and then continue.
Plus, finding a topic to review is far easier to find in a list than scrolling through a video.
How to use the table below:
Later, if you want to go back and review a particular “Subject” ... you do not have to go back through the entire list. Just go to the particular link you want to review.
For example, suppose you want to go back and review how to set your own product prices. You do NOT have go back ... clicking through the entire list ... to get back to that subject.
Just go back to the list to find your topic “Set Your Own Prices” ... and then click on the link next to it in the right-hand column.
Note: You DO NOT have to learn all this stuff in the table below ... but it is there for you to review as you wish:
Table 1
One of the biggest secrets of this presentation is that the artist needs to learn everything that a buyer would need to know in order to purchase products from the artist’s website. ... and that is the biggest mistake that most FAA website owners make.
No one knows the artist’s products better than the artist who posted it ... but buyers will not buy from websites when they cannot understand its operations!
Unfortunately, the big disconnect is that many artists on FAA hope that their customers are experienced enough to know how to look up ... and purchase ... their products on FAA.
That is a big mistake ... because website owners need to know just as much about purchasing from their own websites as their customers will need to know (i.e., and this book can help both website owners and website visitors learn exactly how that works).
However, if an artist cannot answer questions about product choices and product feature management ... that could not only be embarrassing but could also result in lost sales and potential customers.
Therefore, most of the rest of this presentation will be presented to help the artist’s visitors figure out how to make the most desirable product-change choices to fill their needs.
In case you do not know ... much of the magic of FAA product fulfillment happens through the skills and abilities of the staff who work at the 16 FAA warehouses around the world.
What am I talking about? A customer might want to buy some framed art for office, home, a rental, or other projects.
Many customers also want to buy products as gifts for various occasions ... and many of those buyers would like to purchase the same nice product for others but in different colors.
This is where the artist’s knowledge of the frames, mats, etc. available on FAA ... could score some big points with a potential customer ... and the customers they tell about you.
Many customers do not have basic facts to know ... that on FAA they:
The more that artists know about the possibilities for their own products ... the more successful they can be in sales ... and in gaining new customers.
Therefore, this publication will not only be a big help for artists who engage in helping their customers to make better choices ... but it will also be a big help for customers who can make much better choices when buying artist’s products from FAA websites.
Here is the test for artist FAA website owners ... go back and look at your own products as if you are going to buy something.
Website owners will usually find some of their own products and product descriptions that they do not like ... and customers might not like them either (i.e., and will not buy them).
It is a simple matter for the website owner to go back and review all their set-up pages to see if they could make them better (i.e., colors, color combinations, sizes, etc.).
Then ... actually go through the process of ordering one of your own products. If you had any problems at all ... then you can anticipate problems that your customers will go through when they try to order one of your products.
You want to make sure that customers will not abandon your cart because they became frustrated while trying to order one of your products.
How can you get the book? Once again ... here is the information:
Tips Tricks Tutorials Using Fine Art America – For Buyers Sellers Artists Photographers and Website Owners
The print book is also very good ... and many people prefer to have a print book in addition to an eBook.

